I can post pictures except from my Google online storage, which I don't have or doesn't exist.
I am debating migrating my blog to another site as this sort of bullshit pisses me off.
Today, I helped my friend Ron by finishing off a job of fairing parts of his hull. I'm only too glad to help him as he is helping me finish my interior. All that is left of this many day project is to do the final sanding--ten minutes tops tomorrow.
As for ECHO, I trimmed many exposed screws projecting out of the forward bulkhead in the salon. It seems the former paneling was attached from the other side which is no longer accessible. I used a dremel tool and a pair of pliers. Next I sanded both port and starboard side. I removed most of the paneling, but much of the glue remained. I found a few more screws and small bronze nails and also discovered a 36" section of tabbing that joined to pieces of plywood had delaminated. I used a grinder with 60 grit to clean up all the remaining glue, and to cut out the damaged section.
I followed this up with tabbing in a piece of stitched mat tape to replace the one I removed. I used fast hardener and put a piece of wax paper on top to help hold it in place and also to squeeze out any air pockets I could see. I think it will be fine tomorrow and won't need any sanding unless the was paper sticks.
I have photo's but can't upload them.
Finally, I test fitted my new tank cover--it is 1/4" too short, but otherwise a welcome addition to making the floor level.
Monday, May 13, 2013
Sunday, May 12, 2013
ICOM M802 Specs
- Standard 4 × 8 remote controller. The IC-M802 offers an industry-standard 4-inch tall (10.16
- cm) remote controller. When set up with the IC-M502 VHF radio, Icom offers you a complete communications station.
- Large LCD with dot matrix characters
- You can easily read the alphanumeric name of any of the
- 1355 ITU channels at a glance with the large LCD display.
- Nighttime operation is no problem with 10 levels (plus OFF) adjustable backlit display and keypad.
- Easy to use in all conditions
- The IC-M802 offers two large dials – bank and channel– for easy channel selection. Up to 16 banks of 20 (max.) each for user channels, and 17 banks for ITU channels are available.
- Built-in digital selective calling
- For added safety at sea, the IC-M802 offers the latest in one-touch DSC emergency communications technology. (ITU Class E standard.) The emergency button is covered by a red, spring loaded hatch to avoid accidental DSC activation.
- Digital signal processor advantage
- The speech compressor, utilizing DSP, increases average talk power. Flexible filter settings provide for narrow band signals like e-mail, SITOR, FSK and other operation without an optional filter.
- 150W (PEP) of powerful output 150 Watts of power offers superior worldwide communications. A one piece, die cast aluminum chassis and a large cooling fan allow continuous transmission at full output power –very important for data communications, like e-mail.
- One-touch e-mail access
- An SSB first! The IC-M802 can be set to memorize your
- HF e-mail access frequency, mode and bandwidth settings.
- At sea e-mail has never been easier. * Please consult with an HF e-mail provider for details.
- Automatic antenna tuner, AT-140
- An optional automatic antenna tuner, AT-140, easily connects
- to the IC-M802. When the tuner cannot tune the antenna,
- the IC-M802 bypasses the tuner and displays a
- warning indicator on the LCD.
--Wide band receive coverage (0.5 – 29.9999MHz)
--Remote control mic allows you to select channels directly
--Accessory RS-232C port allows connection of modem, etc.
--GPS input, NMEA 0183 version 3.01
--A headphone jack in front of the controller
--The latest ICOM Digital Signal Processor technology with a compact remote head
ICOM M802 Single Sideband Marine Radio
I was lucky to purchase a used ICOM M802 Marine Radio on eBay for about 1/3 of the cost new. I will need to buy a new mounting bracket and some cables. The microphone connector is broken, and that will need to be repaired. I can either buy or building my own cables and brackets.


BRg-iMF)Jw~~60_57.JPG)


Actual photo's of my radio.

The head of radio can be mounted remotely from the radio base.

BRg-iMF)Jw~~60_57.JPG)

Note the damage to the microphone connector.

30 Gallon Holding Tank
ECHO has never had a holding tank. I am building one.
Some considerations. I hate Wye valves. I believe the only way to plumb a holding tank is to pump everything into it, and have a suck out port at the top and a drain at the bottom. I also believe the holding tank should be above the waterline, and as large as possible.
I decided to use the space above the cabinet. It will be a tight fit, but by custom making my own holding tank, I can maximize the volume of my holding tank.
My rough estimate is it will be a bit under 30 gallons. While not big, that is a decent size, and I'll met the sanitation laws. I plan to build a much larger holding tank aft.
I decided to make a female mold. If I had to do it over again, I'd make a male mold and not try to lay the whole thing up at once.
My female mold worked ok, but it was a challenge. I've yet to crack the mold, and I'm confident I'll need to add to it on one or both side to make it strong enough to suit my specification.
Here are a few pictures of the mold.
Form plywood cut and stitched (wired) together


Some reinforcing around the middle so I can put pressure on the inside of the form. I plan to use sand and weights to accomplish that.

Maximum strength will come from radius corners--this will allow better drainage. Here I sprayed Great Stuff foam.

Next I smoothed the edges of the foam.

I added some tape to smooth these corners some more. Later I added some plastic sheeting to cover the entire inside.

I cut and fit two layers of fiberglass mat topped with one layer of cloth.
After wetting it down with epoxy, I folded a layer of plastic on top.
Next I filled the box with sand and packed it down.
I felt the wet fiberglass conform to the shape of the mold.
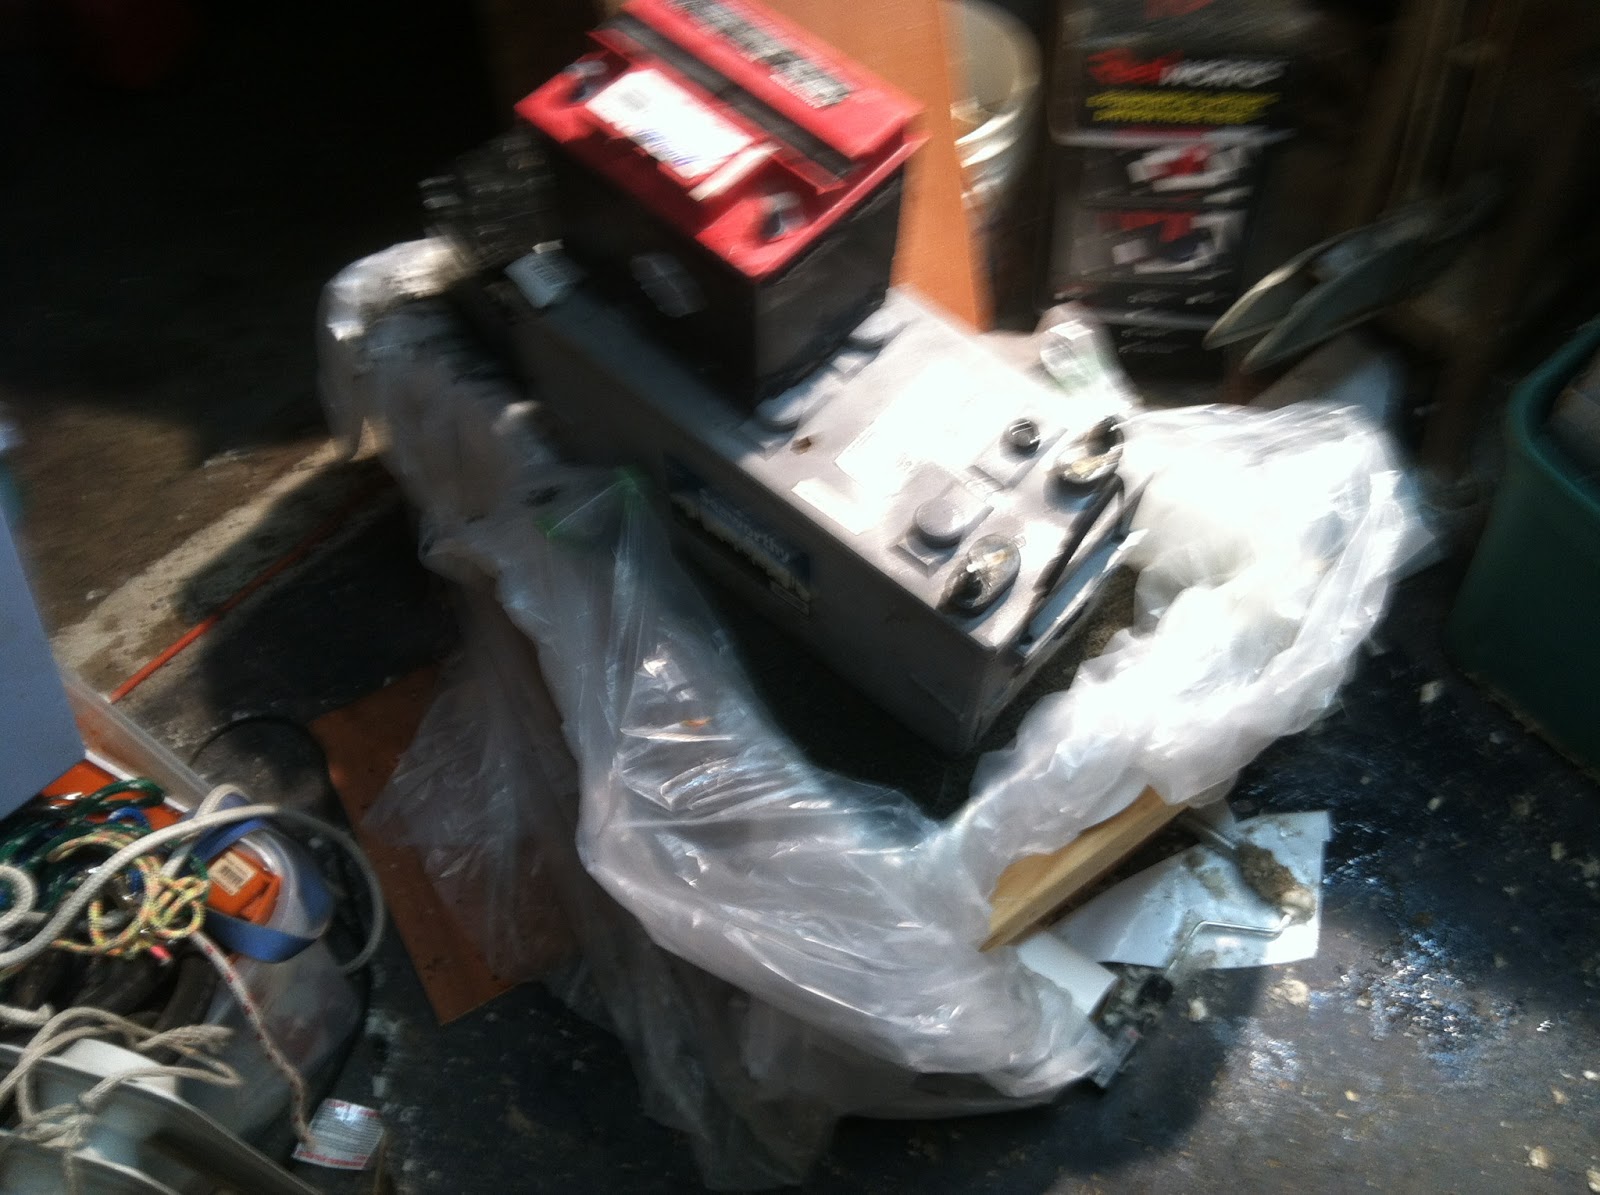
Finally, I put batteries on top for some added weight.
If I had to do it over again, I'd use a male mold and do the layup in several session to ensure the structure was perfect.
Since I used a extra slow hardener, I intend to let it set up an extra day.
Stay tuned!
Saturday, May 11, 2013
Cabin Sole Repair Nearly Complete
Here is an update on what the sole looks like. I cleaned up and cut a board to cover the water tank. I will probably need to put a layer of fiberglass on top of that to make the floor more even.
I'll be moving on to a much easier repair aft at a seam between two floor panels. This will be much easier. I'll just grind off the top layer back about 5 inches on either side, scoop out the rotted core, glass the bottom layers together, recore, fill and glass the top together again. The only issue will be getting in and out of the boat with the ladder removed.
Sunday, May 5, 2013
Auto-Pilot Tiller Arm
I ordered an auto pilot tiller arm.
Here it is:

I still need to drill a hole through the rudder post and decide which mounting pin to use. Note the guide points where are located for easy centering a drill.
I still have to work out a few issues on the location of hydraulic ram. And I have to glass in a mount for it.
Here it is:

I still need to drill a hole through the rudder post and decide which mounting pin to use. Note the guide points where are located for easy centering a drill.
I still have to work out a few issues on the location of hydraulic ram. And I have to glass in a mount for it.
Cabin Sole--99% Completed
I set a goal of having this floor finished by the end of day Monday--since I'm pretty much done, that will not be a problem. I will be done tomorrow when my last session dries.
These photos were taken over the last few days.
Here is the balsa core glued in. At the time this picture was taken: I was filling in the gaps in the core in the picture below. The plywood is being used to hold the retaining fiberglass board strips. Those are being used to seal off the core to prevent water ingress. The plywood is holding the retaining strips in position.

Below port side glassed in, dried. Note: It is clear enough you can see the tan colored filler and balsa through three or more layers of of fiberglass. I started with two 8" wide layers of matt strips on the outside edges. I added some extra on the aft edge. Then I expoxied down two large pieces of matt and the top layer of cloth. I hoped I could do both sides in one session but that was not practical. I was nice having a strong dry platform to work on the next day when this all dried.

Today I glassed in the other (port) side. Again I started with several strips of tape on the edges. Then I followed up with two layers of thick matt over the entire side, and then covered that with a top layer of fiberglass cloth--so that the weave provides some traction. Finally there is a layer of tape--stitched matt sewn to fiberglass cloth on top of the outside edge--see the tape on the top edge?
So the floors are just about done except for some touch up. I've completed the bridge connecting the two sides--in right side of photo above adjacent to the mast. I will need to complete the section in front (to the left) of the three water tank ports, and to the right of the opening in the floor
All this means that I can start tabbing in the salon furniture as soon as it is built.
Subscribe to:
Posts (Atom)
